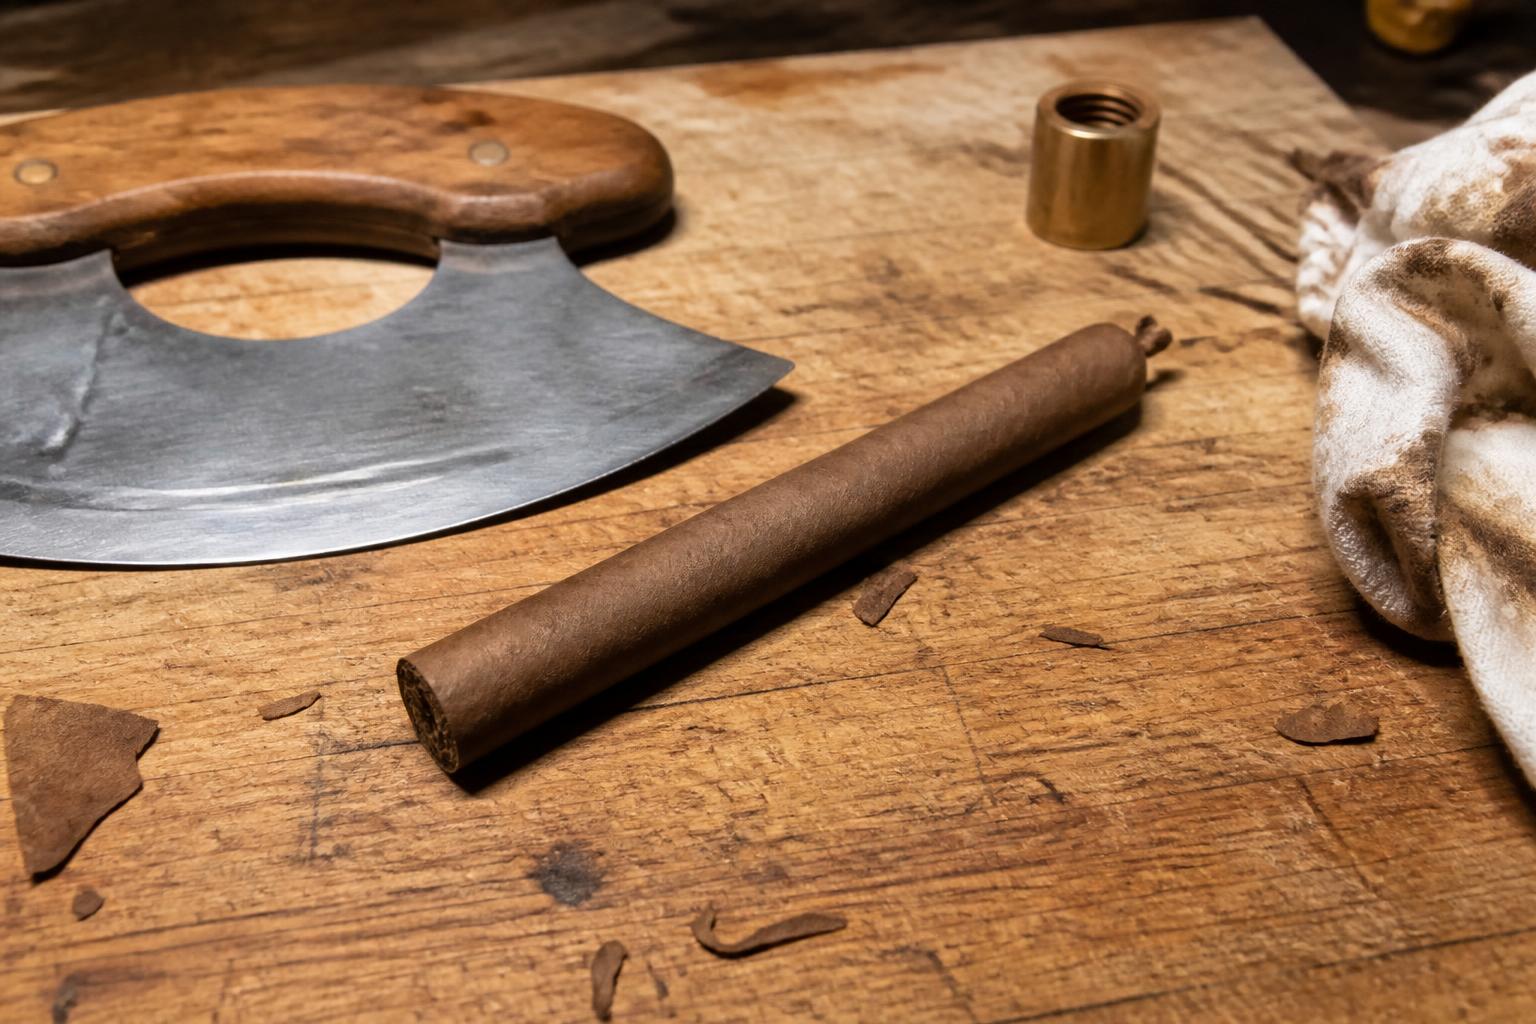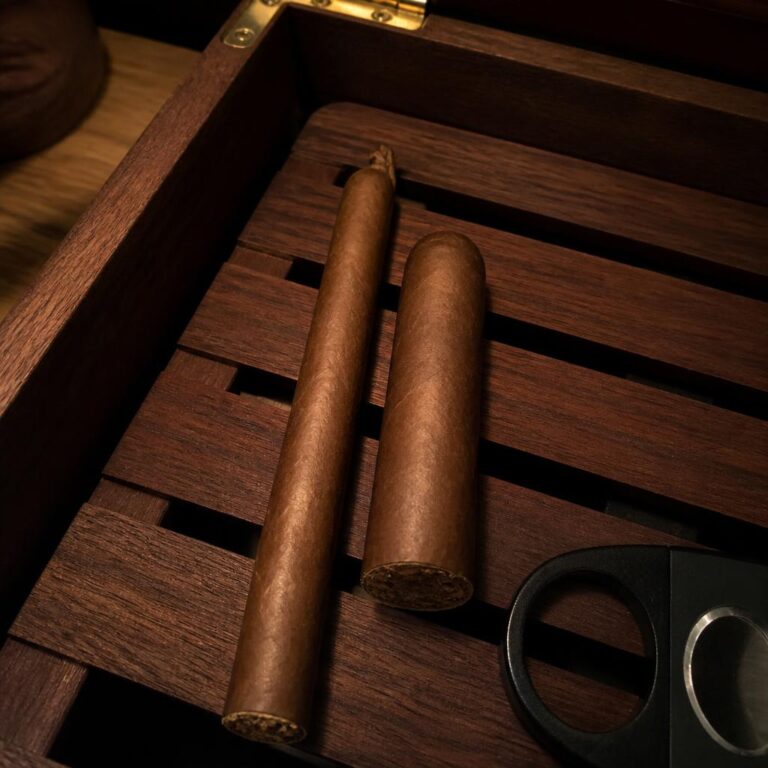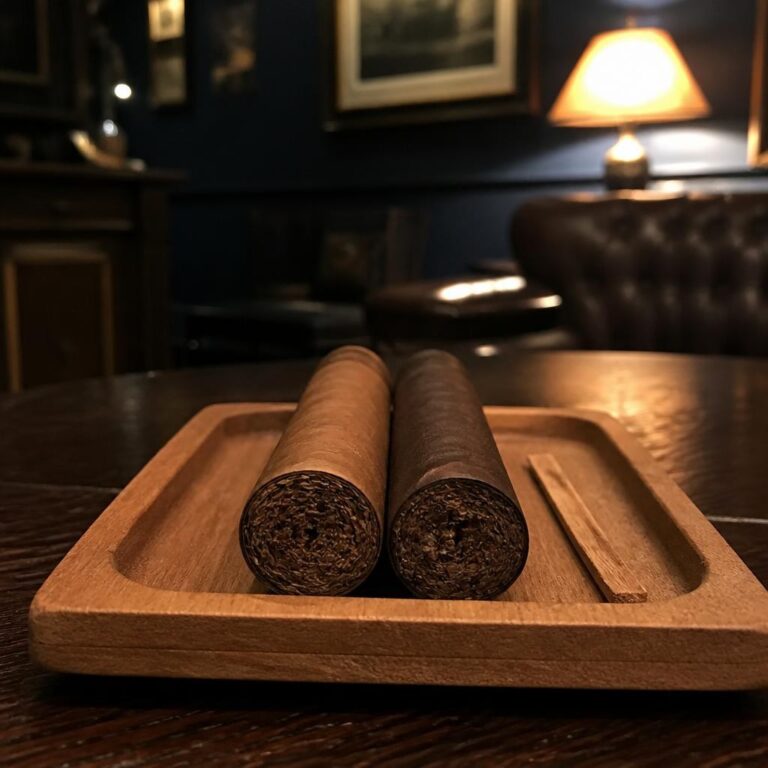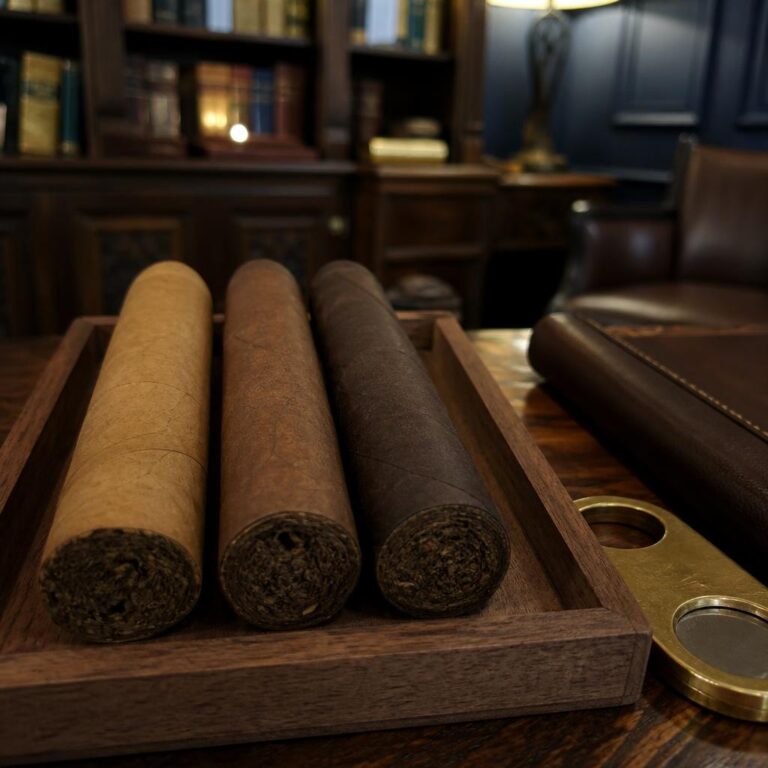
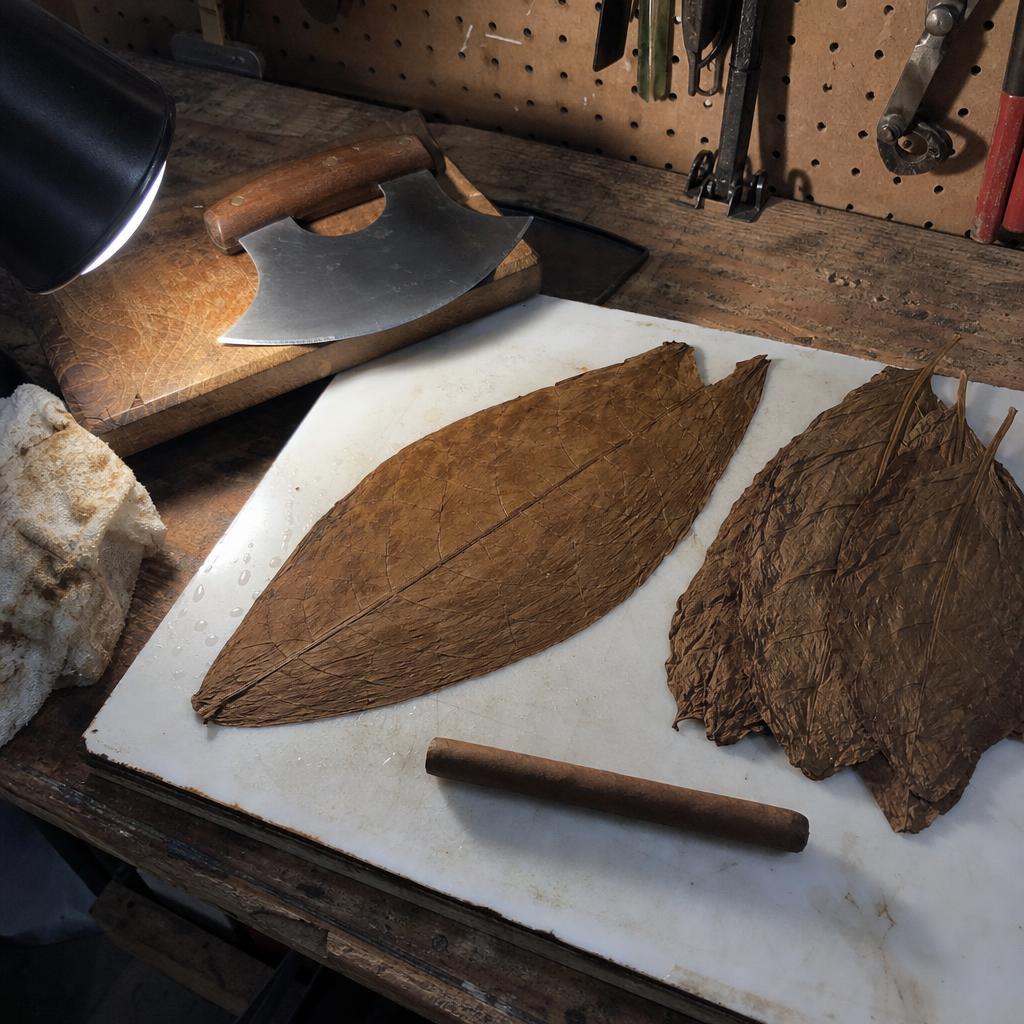
Rolling a cigar at home takes three kinds of tobacco leaf, a blade, a pinch of glue and two to three unhurried hours. A hand-rolled cigar is built from the inside out: a bunch of filler leaf, held in a binder leaf, dressed in a wrapper leaf and closed with a cap. A first-timer can make one worth smoking without a mould or a press: a kitchen chopper does the roller’s blade work, a pipe fitting from the hardware shop punches the cap, and a shop-bought cigar serves as the measuring stick.
This guide follows the method of the late Robert Davis, whose 46-minute YouTube lesson, How to roll your first cigar, is the most patient and complete tutorial on the subject I have found. Below are his steps in order, with what each tool costs, the times to watch in the video and a plan for the months after.
On this page
Learn from Robert Davis
Robert Davis uploaded his tutorial on 4 March 2017. He filmed it on a chest-mounted camera at his own bench and rolled a single cigar from loose leaf while explaining every move. His premise is the one most readers of this page share: you are curious, you would like to try, and you would rather not spend a few hundred dollars on factory tools before you know whether you enjoy the craft. So he answers the questions other videos skip: how to flatten a crinkled leaf, how damp each leaf should be, and what to use for glue and when to mix it.
The video has been watched about 1.5 million times. Davis died in 2022, aged 74, and the lesson remains with his dry humour intact. He judges his finished cigar “smooth enough for government work”, which is about the right standard for a first one.
Watch it through once before you start, then keep it open at the bench. The steps on this page follow his order, put his teaching in my own words and add what I wanted to know at each stage. The timestamps below come from a chapter list a viewer posted in the comments, so treat them as close rather than exact; each one opens the video at that point.
| Stage | Watch from | What to look for |
|---|---|---|
| The target cigar and preparation | 2:03 | How he unwraps a shop cigar and reads its construction |
| Household tools | 5:48 | The ulu, the slick surface, the pipe-fitting cap cutter |
| Mixing the glue | 8:33 | How small a pinch of powder he uses |
| Preparing the wrapper | 11:40 | The crescent cut and the leaf sticking flat to a wet surface |
| Preparing the binder | 17:35 | The clamp holding the binder taut |
| Filler moisture | 21:30 | Listen as much as watch: the three states sound different |
| Bunching the filler | 26:20 | Letting the bunch turn by itself |
| Rolling the binder | 29:14 | Pinching only where binder meets bunch |
| Rolling the wrapper | 33:40 | One hand stretching, one hand rolling |
| Cutting the flag | 37:30 | The angled cut that removes the last vein |
| The cap | 41:40 | The crushing twist that punches the circle |
| Smoothing | 43:00 | Rolling the cigar under a flat board |
| Drying and ageing | 44:35 | How the colour changes over days and weeks |
The Three Layers
Every long-filler cigar has three layers. The filler is the core, several folded leaves that carry most of the strength and body. The binder is a single sturdier leaf rolled around the filler to hold it; filler and binder together are called the bunch. The wrapper is the finest leaf on the plant, rolled in a spiral over the bunch, and it gives the cigar its colour and a good part of its aroma. At the head, a small circle of wrapper called the cap closes the end you cut. The anatomy of a cigar covers each part in detail.
Factories make the bunch in several ways. Tobacconist University lists the accordion, the book and the entubado among the common bunching techniques. In the entubado, each filler leaf is rolled into its own small tube. The bunch then goes into a wooden or plastic mould, and the mould into a press, typically for about 30 to 45 minutes. Cigar Aficionado reported in 2001 that Dominican factories were testing bunches on a draw machine before the wrapper went on, and rejecting any that resisted too much.
Davis replaces each of those steps with something you already own or can make. Your hands and a stretched binder do the mould’s job of compacting the bunch. A dab of glue holds the binder where the press would have set it. Nothing in the video replaces the draw machine, but the target cigar comes close: a bunch that matches a good cigar’s weight and give is the best guide you have without one. Palm-rolling and a flat board take out the lumps a mould would have pressed flat. The result will not look like a factory cigar, and it does not need to.
The Household Kit
Davis built his kit so that a beginner need not buy four professional tools before a first cigar. The table sets each one against his household stand-in. The four tool prices, and his prices for the ulu and the laminate, are Davis’s 2017 figures in US dollars; Canadian figures are converted at about 1.42 Canadian dollars to the US dollar, the rate in early October 2026, and rounded. Anything marked approx. is my own rough estimate for a hardware or craft shop, not a quoted price.
| Job | Professional tool | Household stand-in | Rough cost of the stand-in |
|---|---|---|---|
| Cutting leaf | Chaveta, about US$30 (C$43) | An ulu kitchen chopper or a pizza wheel, used with a rolling, crushing cut | Ulu about US$7 (C$10), per Davis |
| Holding the bunch to shape | Mould, US$60 to $100 (C$85 to $142) | Your hands, a stretched binder and a dab of glue | Nothing |
| Trimming the bunch to length | Tuck cutter, about US$200 (C$285) | A scissor or V cutter you already own; toenail scissors to round the head | Nothing |
| Punching the cap | Cap cutter, about US$15 (C$21) | A round-ended pipe fitting, bushing, hose fitting or torch bezel, filed narrower if needed; it crushes, so it need not be sharp | approx. US$2 to $5 (C$3 to $7) |
| A slick work surface | A rolling board | A piece of tile or a laminate offcut | Laminate offcut about US$2.65 (C$3.76), per Davis |
| A cutting surface | A rolling board | Any wooden chopping board | Nothing |
| Keeping leaf damp | None | A spray bottle of water; a small diffuser or humidifier nearby | approx. US$2 to $5 (C$3 to $7) for the bottle |
| A third hand | None | A clamp or a hobbyist’s helping-hands stand to hold the far end of the binder | approx. US$10 to $20 (C$14 to $28) |
| Glue | Vegetable gum or pectin | Methylcellulose powder, the same cellulose used in wallpaper paste | approx. US$5 to $10 (C$7 to $14) a tub |
| Clean-up | None | A rag, laid out before you begin | Nothing |
The leaf is the one thing you must buy from a tobacco seller. Davis used a blend kit from a whole-leaf supplier: wrapper, binder and filler chosen to work together, enough for a handful of cigars. A kit spares you the blending question on your first night, which is a question for your fifth. If you later blend your own, the old rule of thumb applies: leaf from the top of the plant (ligero) is the strongest, leaf from the middle (seco) milder, and leaf from the bottom (volado) mainly helps the cigar burn.
Davis puts the rag first on his list for a reason: the beginner, he says, goes looking for it after the mess is made.
Choose Your Target Cigar
Davis calls the target cigar his most important tool, and it costs the price of one cigar. You buy a cigar of the size you want to make, unwrap it, and use it all evening as the standard for bulk, diameter, weight, length and firmness. His comparison is archery: you cannot improve your aim without something to aim at. Without a mould, the target is how you know whether the bunch in your hand is right.
Pick a corona. Cigar Aficionado gives the traditional corona as 5 1/2 to 6 inches long with a ring gauge of 42 to 44, and the robusto as 4 3/4 to 5 1/2 inches by 48 to 52. Davis prefers the corona for a first attempt because large ring gauges burn through leaf: a fat cigar needs more filler, and a beginner’s blend kit will not stretch as far. Ring gauge is the diameter in sixty-fourths of an inch, so a 42 is about 16.7 mm across; the ring gauge guide has a printable chart if you want to check your bunch against a circle.
| What to choose | Why it helps a first cigar |
|---|---|
| A corona, about 5 1/2 x 42 to 44 | Thin enough to need little filler, long enough to practise the spiral |
| A round cigar, not box-pressed | Your hand-rolled cigar will be round; a pressed target misleads the eye |
| A long-filler cigar | It comes apart into whole leaves you can study |
| A cigar you would happily sacrifice | You are going to take it apart |
Before you unwrap it, read it. Look closely at the wrapper and you will see the faint lines of the veins: they run lengthwise and sit on the underside of the leaf, against the binder. A straight ridge down the length of the cigar is a mould mark, the one thing your cigar will not have. Look at the head: the cap is a separate small circle laid over the rough end. Just below it, the spiral of the wrapper finishes in a tab of leaf called the flag, wound round the head to strengthen the part your teeth and lips grip. Davis likes a bigger flag than most commercial cigars carry, so the cigar can roll in the mouth without loosening.
My own suggestion, which is not in the video: before you unwrap the target, clip its head and take a cold draw, so you know what an open draw feels like.
Then unwrap it slowly, wrapper first, and weigh the bunch in your palm. If you have a kitchen scale that reads to a tenth of a gram, weigh the target’s bunch and build yours to the same figure. That weight and that give are what you are building towards.
Without a mould, the target is how you know whether the bunch in your hand is right.
Mix the Glue
Mix the glue the evening before. Davis uses methylcellulose powder: a small pinch in a pill cup of water, stirred. It will look like water with white specks in it, and the specks dissolve overnight into a faintly foamy paste. Conservation suppliers give the same advice for their methylcellulose paste: let it stand several hours, overnight if possible. Mixed on the night, it stays lumpy.
Other glues work. Pectin is a traditional cigar adhesive, and so are guar gum and gum tragacanth; Davis tried pectin and disliked its citrus taste, and mentions that some people use mashed banana. Anything sticky and food-safe will hold a binder. What you want is the least flavour and the least glue that does the job, since every drop sits close to your lips.
While the glue stands, open the blend kit and look at the leaf. Lay each leaf flat on a clean surface, sort wrapper from binder from filler, and note which filler leaves are crisp and which are soft. If the wrapper and binder are brittle, my own suggestion is to mist them lightly and seal them in a container overnight while the glue stands. Leave the filler as it is. Before bed, give each filler leaf the bend-and-listen test from the filler section below. Set any leaf that sounds too damp aside, give it 30 to 60 minutes on the board at the start of the session, and test it again.
Your First Session
A first cigar takes longer than the video, because you will stop, rewind and redo. Allow a little over two hours for the first cigar, from clearing the table to a capped cigar, longer if the filler needs drying, and about half that for the second. Book a whole evening and plan to roll two: the first to make the mistakes on, the second to keep.
| Stage | Time to allow | Can it wait? |
|---|---|---|
| Mix the glue | 5 minutes, the night before | No; it must stand overnight |
| Set out the kit and the target cigar | 15 minutes | No |
| Prepare the wrapper | 15 minutes | Yes, if kept damp on the slick surface |
| Prepare the binder | 10 minutes | Yes, if kept damp and clamped |
| Sort and judge the filler | 20 minutes | Yes; too-damp leaf needs 30 to 60 minutes of drying anyway |
| Bunch and bind | 25 minutes | No; finish once started |
| Wrap and flag | 25 minutes | No |
| Cap, smooth and trim | 15 minutes | No |
| Tidy the bench | 10 minutes | No; the glue sets if you leave it |
The checklist, laid out before you sit down:
- The target cigar, still whole
- The blend kit: wrapper, binder and filler
- The glue, mixed the night before, and a small brush or a cocktail stick
- The ulu or pizza wheel, the wooden board and the slick surface
- A spray bottle of water, and the diffuser running nearby if your room is dry
- The clamp or helping hands, set at the edge of the bench
- A cutter or small scissors for the head and foot
- The pipe fitting for the cap
- The rag
- Clean, dry hands, and the video open at 2:03
Prepare the Wrapper
Davis works backwards. You prepare the wrapper first, then the binder, then the filler, and assemble in the reverse order, so the most delicate leaf is ready and resting when the bunch is done. Gentle hands matter most here. Davis passes on advice from Craig Smith of F.X. Smith’s Sons, a family cigar maker in McSherrystown, Pennsylvania, about how light a roller’s touch has to be. Treat the wrapper as you would wet tissue paper.
- Find the outside of the leaf. The darker, smoother side with the less prominent veins faces out. The veins must run along the length of the finished cigar, never around it.
- Find the two ends. The stem end was attached to the plant; the tip is the narrow far end. You will need to know which is which when you cut the ribbon.
- Tickle the leaf open. Working from the underside, coax the folds and crinkles out with your fingertips until the leaf lies open. Pulling flat from the edges tears it.
- Take off one half. Cut along one side of the central stem with a rolling, crushing motion of the ulu; a slicing cut drags the leaf. Each half of a wrapper leaf rolls in the opposite direction, which is why rollers learn to work with either hand. Davis takes the left half, tip towards him and stem away.
- Cut a crescent from the base. Near the stem end the veins are coarse and hold the leaf stiff. A shallow crescent cut away from that area frees the leaf to stretch.
- Lay it on the wet slick surface. Spritz the tile or laminate, lay the leaf on it outside face down, and smooth it flat with your fingers. The film of water holds it in place and lets it stretch a little. Mist it again whenever it starts to dull.
Watch this part: 11:40.
Prepare the Binder
The binder is tougher than the wrapper and is never seen, so it forgives more. Its job is to hold the bunch together and, as it dries, to shrink and tighten everything inside it.
- Find the inside face. The underside, with the more prominent stem and the lighter colour, faces inwards against the filler.
- Take the same half. With the tip towards you, cut close to the stem, cut a crescent out of the coarse veins at the base, and tickle the leaf open as you did the wrapper.
- Make it limp. The binder should be damp enough to hang completely limp. Davis’s drape test: lay it over a finger and it should fall straight over both sides.
- Clamp the far end. Fix the far end in the clamp or helping hands so that you can stretch the binder against it as you roll. As the binder dries, that tension tightens the bunch.
Watch this part: 17:35.
Read the Filler
This is Davis’s clearest lesson and the part most written guides skip: filler moisture is judged by sound and feel, and filler wants to be far drier than wrapper or binder. Wrapper and binder must stretch. Filler must burn, and it should hold its shape when you fold it.
Pick up each filler leaf, bend it, listen to it, and try to pull out a piece of the stem. It will be in one of three states.
| State | Sight and feel | Sound | The stem test | What to do |
|---|---|---|---|---|
| Too damp | Floppy; stretches without tearing | Rustles with no crackle | Tears out with a soft ripping sound | Leave it on the board for 30 to 60 minutes and test again. If you use it anyway, open it out and put it on the outside of the bunch, where it can dry as the cigar rests |
| Just right | Holds its shape; bends a little but is not limp; too crisp to stretch | A dry rustle | Snaps with a crunchy sound | Use it. Bend it fully and it should just begin to crack |
| Too dry | Stiff; edges crumble when you pull the vein | Plenty of crackle | Crumbles at the edges | Still usable, a shade dry. Put it at the centre of the bunch |
Then arrange the pile: the driest leaves go in the middle of the bunch, the dampest on the outside. Damp leaf at the core has nowhere to dry, and a damp, overfilled bunch is a known route to a tight draw.
Watch this part: 21:30, with the sound up.
Build the Bunch
Ignore any recipe that counts leaves. Leaves vary too much in size for a number to mean anything. Measure against the target cigar instead, and keep it beside you.
- Even out the tapers. Each filler leaf narrows at both ends. Fold or pinch the tapered ends back so the leaf carries the same amount of tobacco along its whole length.
- Build from the middle out. Lay the driest filler in the centre, the damper leaf around it, and gather the pile into a loose bunch. The bunch will grow longer as you work it.
- Feel for gaps and lumps. Run your fingers along the bunch. Where it is thin, add half a leaf; where it is fat, take some out. Compare it with the target’s bunch for length, thickness and weight in the hand.
- Point the tapers to the foot. Any pointed ends you could not fold away go towards the foot, the end you will light.
- Roll the binder on. Lay the bunch across the near end of the binder, stretch the binder against the clamp, and roll towards it. Pinch only where the binder meets the bunch. Do not grip the filler itself, or it twists, and a twisted bunch is a plugged cigar. Let the bunch turn on its own inside the binder.
- Glue the edge. A factory roller would press the bunch now. You put a small dab of glue where the binder finishes, to hold it. Before the glue sets, draw gently through the bunch (my own check, not in the video). If it resists far more than the target did, open it and rebuild now; once the wrapper is on, it is much harder to fix.
- Fix a starved end. If one end feels thin, push a little more filler into it before the glue sets.
- Smooth it. Roll the bunch under your palm a few times, always in the same direction you rolled the binder. Rolling it the other way starts to unwind it.
- Trim the bunch. Round the head with your cutter or a pair of toenail scissors, and cut the foot to length against the target cigar.
If the bunch has come out thinner at both ends than in the middle, Davis’s answer is to call it a semi-perfecto and carry on. It is a legitimate shape.
Watch this part: 26:20 for the bunch and 29:14 for the binder.
Roll the Wrapper and Flag
By now the wrapper on the slick surface will have stretched noticeably. That is what you want. As it dries on the cigar it shrinks back, and the shrinking gives a finished cigar its tight, faintly shiny skin.
- Cut a ribbon. Cut a straight ribbon about 2 1/2 to 3 inches wide (6.4 to 7.6 cm) from the outer edge of the leaf, letting it widen towards the end that will finish at the head. If the leaf is short, a curved ribbon works too.
- Dry the bench. Wipe the work surface around the ribbon dry with the rag. Leave the wrapper itself damp: a wet leaf lies tight on the bunch and stretches.
- Start at the foot. Keep the ribbon outer face down against the surface, so that face ends up on the outside of the cigar. Lay the bunch at the narrow start of the ribbon with the veins running parallel to the cigar, and tuck the pointed edge under the bunch so it is trapped.
- Roll and stretch. Keep one hand on the cigar at all times. Stretch the leaf gently with one hand while you roll with the other, and the edge will climb the cigar in a spiral, each turn overlapping the last by about a quarter of an inch (6 mm).
- Check the direction. After the first half-turn, stop and look. The veins should run along the cigar and the edge should climb towards the head. If the veins angle across or the edge does not climb towards the head, unroll it, lay the bunch again with the veins parallel and the ribbon angled up towards the head, and start again.
- Anticipate the flag. As you near the head, look ahead to where the spiral will meet the next vein. Cut across at an angle to remove that vein and leave a tab of leaf: the flag.
- Glue. Put a little glue along the flag, around the head, and a touch where the wrapper first meets the bunch.
- Wind the flag round the head. Wrap the tab around the head and trim loose bits with scissors or a thumbnail. Pinch the very top closed.
That pinched tail, the pigtail, is itself a finished head; some rollers leave it long or curled and stop here. If you would like a capped head, carry on.
Watch this part: 33:40 for the wrapper and 37:30 for the flag.
Finish the Cap
- Nip the pigtail. Cut it off close and palm-roll the head round.
- Glue the head. A small dab, spread thin with a fingertip.
- Punch the cap. Press the pipe fitting onto a spare scrap of wrapper with a crushing twist. It punches a clean circle without needing an edge.
- Lay it on. Centre the circle on the head and press it down around every side so no edge lifts.
- Smooth under a board. Roll the whole cigar under the flat wooden board, with light pressure, to settle the wrapper.
- Trim the foot. One clean cut to final length.
- Roll it on the table. A gentle roll across a flat surface shows you how straight it is. Small lumps are normal on a cigar made without a mould, and they will not stop it smoking.
Drying and Ageing
A fresh home-rolled cigar is dark and damp, and it changes visibly over the first days. By Davis’s account it begins to shine after about a day, feels drier after about three, and after about three weeks looks close to a shop cigar.
You can smoke it the same evening. It will burn, and there is a quiet pleasure in lighting something you made two hours earlier. It will also taste young. Davis describes plateaus after that: at around five to six weeks the leaves begin to settle in with one another and the flavours meld; another step comes at four to five months; and by about six months the cigar is near its best, mellow, with the harshness gone. If you will not smoke a batch soon, put it away and leave it.
My own suggestion, not from the video: leave a new cigar out on a clean board for the first few days, turned once a day, until the surface no longer feels damp, and then move it into the humidor at 65 to 70 per cent, the range rolling guides recommend. The guide to storing cigars covers the humidor side, and how to age cigars explains what changes in the leaf over months.
Plateaus are only useful if you notice them, and memory is poor at comparing a cigar in week six with its twin in month five. If you keep a humidor in Cigarro, a home-rolled cigar goes in by free text, since no catalogue lists it. Put the rolling date in the purchase date, set “resting since” to the same day, and use the notes field for the kit and anything you changed. Roll three or four from the same kit, then smoke one at each plateau and log it with a Quick Log or a full review by thirds using the Cigarro Method. Six months on, your own scores will tell you more about your batch than any rule of thumb.

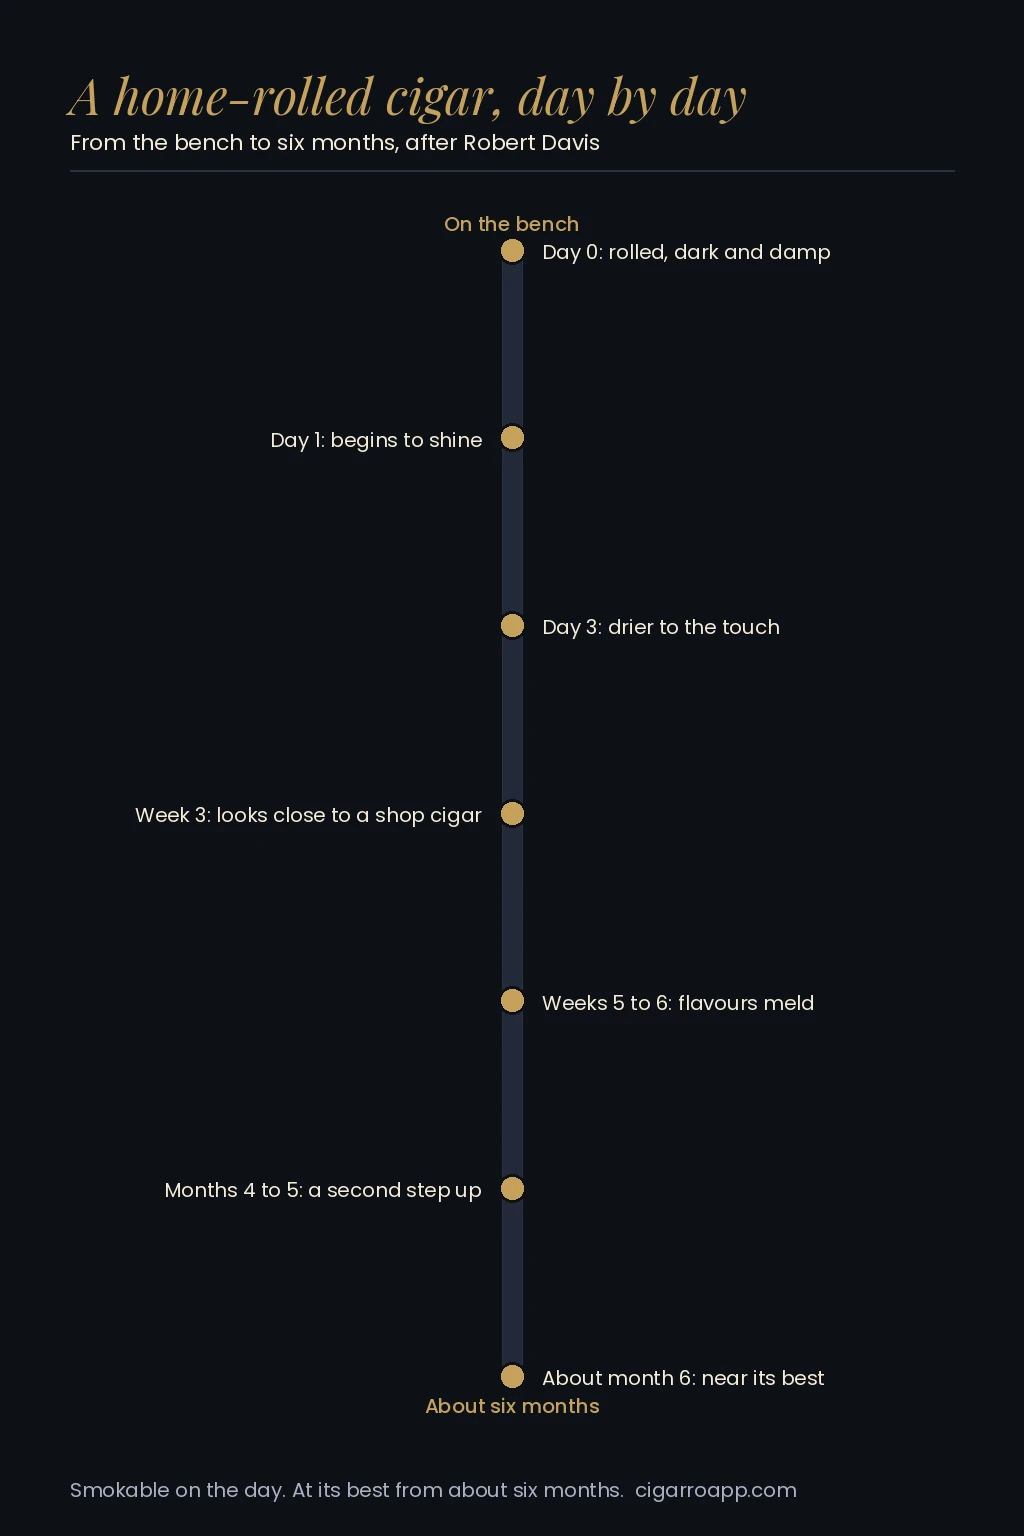
A home-rolled cigar looks finished at about three weeks and tastes its best at about six months.
Common Faults and Fixes
Most faults in a home-rolled cigar trace back to a particular step. The table puts the fix next to the cause.
| Problem | What you notice | Usual cause | Fix on this cigar | Prevention next time |
|---|---|---|---|---|
| Plugged draw | You cannot pull air through it, or only with effort | The filler was gripped and twisted while rolling the binder; too much filler; damp leaf in the middle | Squeeze along the cigar to find the hard spot; cutting just ahead of it can free the draw, at the cost of length | Pinch only the binder; let the bunch turn by itself; driest leaf in the centre; match the target’s weight |
| Soft spots | The cigar gives under a gentle squeeze in one place | Gaps in the bunch; tapered leaf ends not folded back | Little to be done once wrapped; smoke it first and learn from it | Feel the bunch along its length and add half a leaf before the binder goes on |
| Starved ends | The head or foot feels hollow or caves in | Leaf tapers left at the ends; not enough filler pushed into the end | Trim the starved end back to firm tobacco | Even out the tapers before bunching; top up thin ends before the glue sets |
| Wrapper tears | Splits while rolling or as it dries | Leaf too dry; coarse veins left in; stretched too hard; rough hands | Glue a small patch of spare wrapper over the tear, veins running the same way | Keep the wrapper misted on the slick surface; cut the crescent; stretch gently |
| Wrapper unravels | The spiral lifts at the head or along the seam | Too little glue at the flag; bunch smoothed against the roll | Re-glue the lifted edge and wind it back on | Glue the flag and the head; always smooth in the rolling direction |
| Cap lifts or unravels | The circle peels away from the head | Too little glue; edges not pressed all round; head too damp | Peel it off, re-glue and punch a fresh cap | Spread a thin even film of glue and press the cap down on every side |
| Uneven burn | One side burns ahead of the other | Damp filler on one side; a lopsided bunch | Touch up the slow side with your flame | Arrange filler evenly by moisture; rest the cigar longer before smoking |
If the draw is tight but not blocked, give the cigar another week or two of drying before you judge it.
Home Rolling and the Law
Rolling for your own use is broadly legal in both Canada and the United States, within limits worth knowing. This is a plain reading of the statutes, not legal advice, and provincial or state rules sit on top of it.
In Canada, section 25(3) of the Excise Act, 2001 lets an individual without a tobacco licence make cigars for personal use from packaged raw leaf tobacco on which the duty has been paid. A separate paragraph covers leaf you grow yourself on land where you live, capped at 15 kg a year for you and for each adult family member who lives with you. The Canada Revenue Agency’s guidance defines personal use as use by you, or by others at your expense, and says it does not include selling. So you may roll for yourself, and share one with a friend at your own expense; you may not sell them.
In the United States, federal excise tax law defines a manufacturer of tobacco products so as to exclude a person who makes cigars solely for their own personal consumption or use (26 U.S.C. 5702(d)). Selling what you roll makes you a manufacturer in the law’s eyes, with the federal permit and excise tax that follow.
The age rules follow the leaf. The federal minimum age to buy tobacco is 21 in the United States and 18 in Canada, where some provinces set it higher, at 19 or 21. Buying a blend kit means meeting that age where you live.
Questions Answered
Can you roll a cigar without a mould (or mold)?
Yes. A mould compacts the bunch and sets its shape, and without one you do that work with your hands, a binder stretched against a clamp, a dab of glue and a target cigar to measure against. Palm-rolling and a flat board smooth the result. It will be a little less even than a factory cigar and will smoke perfectly well.
How long should a home-rolled cigar rest before you smoke it?
You can light it the same day, but it will taste young. By Robert Davis’s account the flavours start to meld at five to six weeks, improve again at four to five months and reach their best at about six months. By about three weeks it looks close to a shop cigar.
What glue do you use to roll a cigar?
Methylcellulose powder, the cellulose used in wallpaper paste, is a good choice: a pinch in a little water, mixed the night before so it dissolves. Pectin, guar gum and gum tragacanth are traditional alternatives. Use as little as will hold.
How do you know if tobacco leaf is too wet to roll?
For filler, listen. Leaf that is too damp is floppy, rustles without crackling and tears at the stem with a soft rip; leaf that is right holds its shape, rustles drily and snaps with a crunch. Wrapper and binder are the opposite case: they should be damp enough to hang limp and stretch.
Is it legal to roll your own cigars at home?
In Canada, the Excise Act, 2001 lets an unlicensed individual make cigars for personal use from packaged leaf on which duty has been paid. In the United States, federal excise tax law excludes a person making cigars solely for their own use from the definition of a tobacco manufacturer. Selling them is a different matter in both countries, and you must be of legal age to buy the leaf.
How long does it take to roll your first cigar?
Plan on two to three hours for the first, including setting up and tidying, plus five minutes the night before to mix the glue. The second cigar of the evening takes about half as long.
The Cigar You Made Yourself
Watch Davis’s hands about halfway up the wrapper spiral and you can see the point when the leaf starts to behave and the cigar begins to look like one. Your first cigar will be lumpy and a little loose at the head, and you will likely smoke it with unusual attention. Afterwards every shop cigar reads differently: the flag, the cap, the line of the veins, the weight of the bunch in the hand. The aroma of the leaf on your fingers, Davis points out, is a way of enjoying cigars without lighting one. Put the rest of the batch away, mark the dates, and let the six months do their part.